DevOps 카테고리
1. IaC - 구성 및 설정 자동화 - Terragorm, Ansible
2. Container 기술 및 오케스트레이션 - Docker, Kubernetes
3. CI/CD (Continuous Integration/Continuous Deployment, Delivery) - Jenkins, Git, Gitlab
adhoc
- 한 줄 한 줄 세팅하는 것
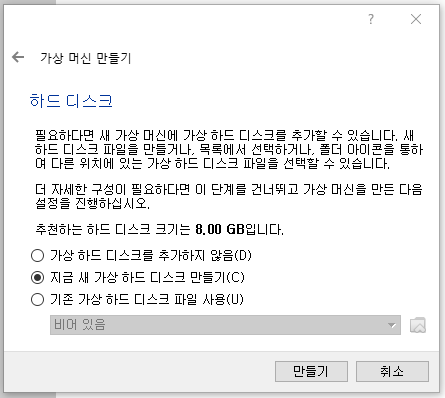
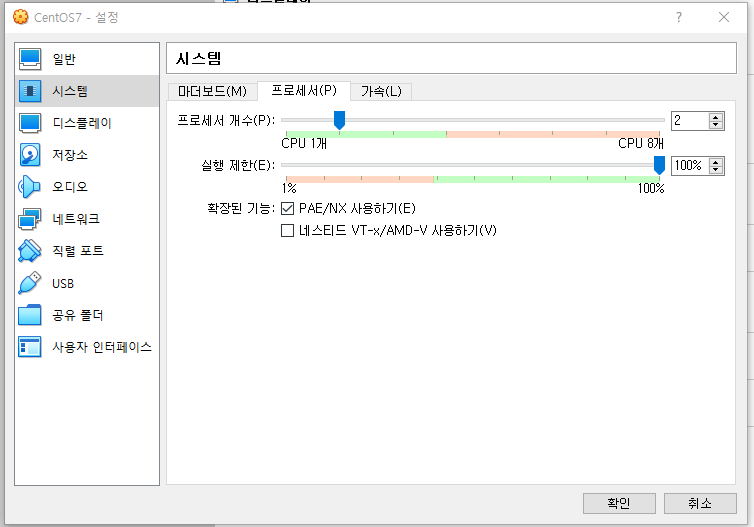
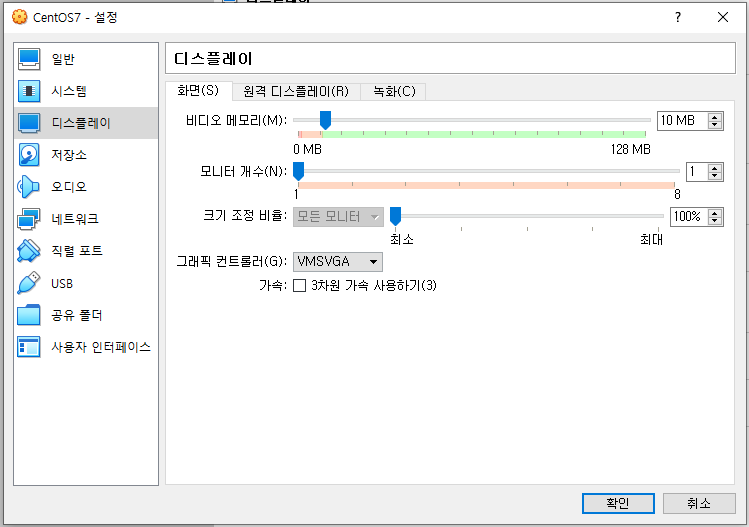
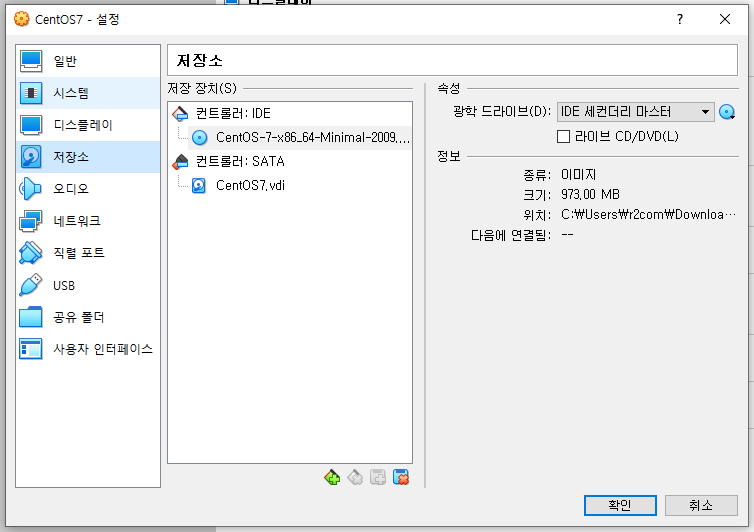
VirtualBox 가상머신 생성


VirtualBox 가상머신 시작


mobaXterm 접속
--- CentOS7 설정
# yum install -y bash-completion wget unzip rdate
# rdate -s time.bora.net
# setenforce 0
# sed -i s/^SELINUX=.*$/SELINUX=disabled/ /etc/selinux/config
# cd /tmp
# systemctl disable --now firewalld
# yum update -y
# poweroff


sed -i s/^SELINUX=.*$/SELINUX=disabled/ /etc/selinux/config :
=> config 경로 안의 SELINUX= 이라고 되어 있는 부분을 disabled로 바꾸는 명령어
업데이트 후 poweroff => OVA 파일 만들기


AWS CLI 설치
--- AWS CLI 설치
# cd /tmp => 데이터를 일정 시간 가지고 있다가 자동으로 지워주는 임시 폴더
# curl "https://awscli.amazonaws.com/awscli-exe-linux-x86_64.zip" -o "awscliv2.zip"
# unzip awscliv2.zip
# ./aws/install => 현재 위치의 aws 폴더의 install 이라는 실행 파일을 실행시켜라
# vi .bash_profile => bash completion을 위한 설정 파일
# complete -C '/usr/local/bin/aws_completer' aws => bash completion 을 실행하기 위해 넣어줘야 할 명령어
# aws --version
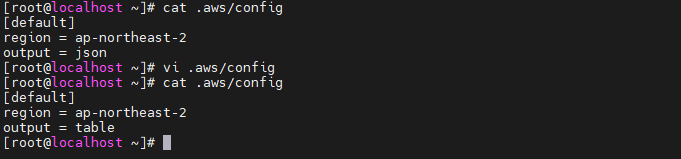
# aws configure


aws IAM으로 이동하여 CLI를 위한 사용자 생성


IAM 사용자로 로그인


VPC와 서브넷 만들기
# aws ec2 create-vpc --cidr-block 192.168.0.0/16 --tag-specification "ResourceType=vpc,Tags=[{Key=Name,Value=NEW-VPC}]" --output text => ec2가 먼저 탄생해서 vpc를 생성하는 명령어가 ec2 뒤에 오게 됨
# NEW_VPC=vpc-0b9644604c489e833
# echo $NEW_VPC
# aws ec2 create-subnet --vpc-id $NEW_VPC --cidr-block 192.168.0.0/20 --availability-zone ap-northeast-2a --tag-specification "ResourceType=subnet,Tags=[{Key=Name,Value=NEW-PUBLIC-SUBNET-2A}]"
# aws ec2 create-subnet --vpc-id $NEW_VPC --cidr-block 192.168.16.0/20 --availability-zone ap-northeast-2b --tag-specification "ResourceType=subnet,Tags=[{Key=Name,Value=NEW-PUBLIC-SUBNET-2B}]"
# aws ec2 create-subnet --vpc-id $NEW_VPC --cidr-block 192.168.32.0/20 --availability-zone ap-northeast-2c --tag-specification "ResourceType=subnet,Tags=[{Key=Name,Value=NEW-PUBLIC-SUBNET-2C}]"
# aws ec2 create-subnet --vpc-id $NEW_VPC --cidr-block 192.168.48.0/20 --availability-zone ap-northeast-2d --tag-specification "ResourceType=subnet,Tags=[{Key=Name,Value=NEW-PUBLIC-SUBNET-2D}]"
# aws ec2 describe-subnets --filters "Name=vpc-id,Values=$NEW_VPC" --query 'Subnets[*{AZ:AvailabilityZone,CIDR:CidrBlock}'

* aws ec2 create-vpc --cidr-block 192.168.0.0/16 --tag-specification "ResourceType=vpc,Tags=[{Key=Name,Value=NEW-VPC}]" --output text
=> --output : output 포멧을 텍스트 형태로 볼 것
* vpc-0b9644604c489e833 => 생성된 vpc의 아이디는 추후 변수로 만들어 줄 것


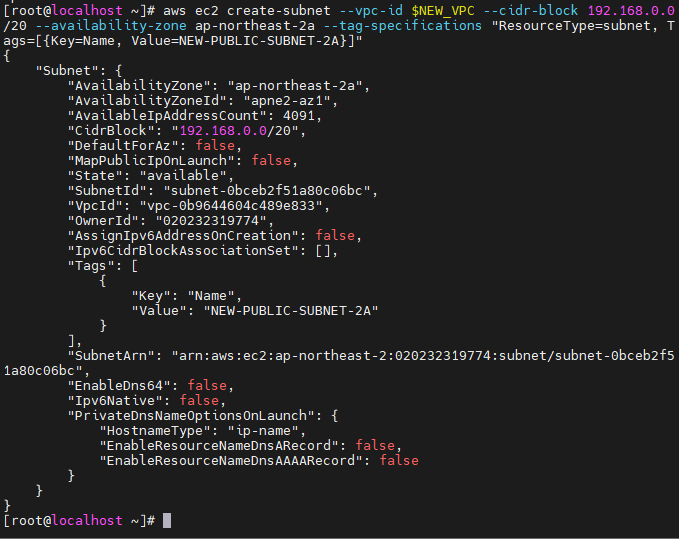
* create 후 --output text와 같이 포멧을 지정해주지 않으면 기본 포멧인 json으로 출력됨


* aws ec2 describe-subnets --filters "Name=vpc-id,Values=$NEW_VPC" --query 'Subnets[*].{AZ:AvailabilityZone,CIDR:CidrBlock}'
=> 셋팅했던 내용들을 보여주는 명령어, sort까지 해서 보여주지는 않음
=> Name 필드 중 vpc-id 부분과 그 중 값이 NEW_VPC인 것만 추려서 보겠음
=> 추린 정보 내에서도 AZ와 CIDR을 보여달라는 의미
인터넷 게이트웨이 만들기(서브넷을 퍼블릭 서브넷으로 만들기)
# aws ec2 create-internet-gateway --tag-specification "ResourceType=internet-gateway,Tags=[{Key=Name,Value=NEW-IGW}]" --output text
# NEW_IGW=igw-07bcf6f436dc7df46
# aws ec2 attach-internet-gateway --vpc-id $NEW_VPC --internet-gateway-id $NEW_IGW
# aws ec2 describe-internet-gateways --output table
# aws ec2 describe-route-tables --filter "Name=vpc-id,Values=$NEW_VPC"
# NEW_RTB=rtb-0c92dd389865be7e3
# aws ec2 create-route --route-table-id $NEW_RTB --destination-cidr-block 0.0.0.0/0 --gateway-id $NEW_IGW


라우트 테이블 설정(서브넷, 엔드포인트 주소)
# aws ec2 create-tags --resources $NEW_RTB --tags "Key=Name,Value=NEW-PUBLIC-SUBNET-RTB"
# aws ec2 describe-route-tables --route-table-id $NEW_RTB --output table
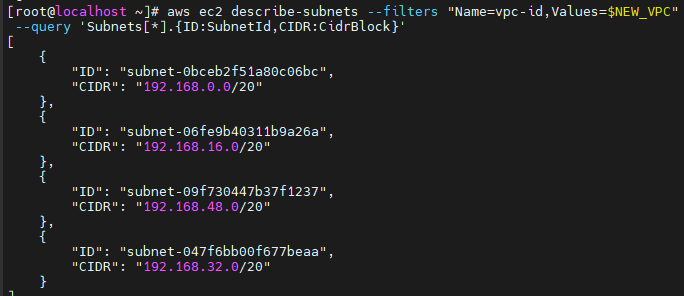
# aws ec2 describe-subnets --filters "Name=vpc-id,Values=$NEW_VPC" --query 'Subnets[*].{ID:SubnetId,CIDR:CidrBlock}'
# NEW_SID1=subnet-0bceb2f51a80c06bc
# NEW_SID2=subnet-06fe9b40311b9a26a
# NEW_SID3=subnet-047f6bb00f677beaa
# NEW_SID4=subnet-09f730447b37f1237
# aws ec2 associate-route-table --subnet-id $NEW_SID1 --route-table-id $NEW_RTB
# aws ec2 associate-route-table --subnet-id $NEW_SID2 --route-table-id $NEW_RTB
# aws ec2 associate-route-table --subnet-id $NEW_SID3 --route-table-id $NEW_RTB
# aws ec2 associate-route-table --subnet-id $NEW_SID4 --route-table-id $NEW_RTB
# aws ec2 modify-subnet-attribute --subnet-id $NEW_SID1 --map-public-ip-on-launch
# aws ec2 modify-subnet-attribute --subnet-id $NEW_SID2 --map-public-ip-on-launch
# aws ec2 modify-subnet-attribute --subnet-id $NEW_SID3 --map-public-ip-on-launch
# aws ec2 modify-subnet-attribute --subnet-id $NEW_SID4 --map-public-ip-on-launch
# aws ec2 modify-vpc-attribute --vpc-id $NEW_VPC --enable-dns-hostnames


서브넷 설정편집
=> 퍼블릭 IPv4 주소 자동할당 활성화를 활성화 시키는 것

키 페어 및 보안 그룹 생성
# aws ec2 create-key-pair --key-name new-key --query 'KeyMaterial' --output text > new-key.pem
# chmod 400 new-key.pem
# aws ec2 create-security-group --group-name NEW-SG-WEB --description "Security group for HTTP_SSH access" --vpc-id $NEW_VPC
# NEW_SG=sg-05fff0c87d3731fdc
# aws ec2 authorize-security-group-ingress --group-id $NEW_SG --protocol tcp --port 22 --cidr 0.0.0.0/0
# aws ec2 authorize-security-group-ingress --group-id $NEW_SG --protocol tcp --port 80 --cidr 0.0.0.0/0
# aws ec2 authorize-security-group-ingress --group-id $NEW_SG --protocol icmp --port -1 --cidr 0.0.0.0/0
=> icmp는 포트번호가 없음, -1은 icmp의 여러 가지 로직 모두를 의미하는 것, 기존의 포트 번호와는 다른 개념


볼륨 및 인스턴스 만들기
# vi mapping.json
[
{
"DeviceName": "/dev/xvda", => xvda : a는 루트 볼륨이라는 것을 의미, 윈도우에서는 C 드라이버, 리눅스에서는 a
"Ebs": {
"VolumeSize": 8
},
}
{
"DeviceName": "/dev/xvdb",
"Ebs": {
"VolumeSize": 8
}
}
]
# vi my_script.txt
#!/bin/bash
yum install -y httpd
systemctl enable --now httpd
echo "<h1>Hello AWS CLI</h1>" > /var/www/html/index.html
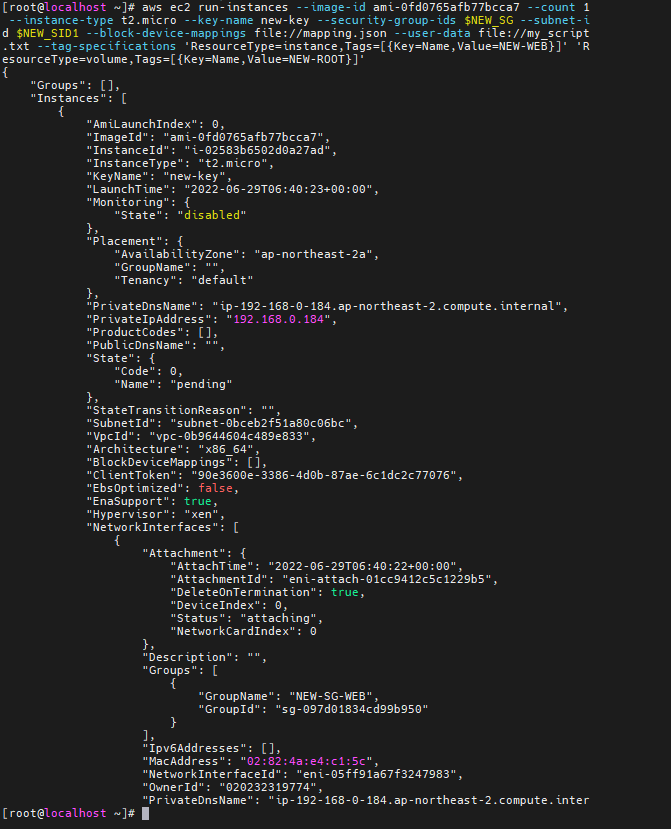
# aws ec2 run-instances \ => create가 아니고 run을 사용
--image-id ami-0fd0765afb77bcca7 \
--count 1 \
--instance-type t2.micro \
--key-name new-key \
--security-group-ids $NEW_SG \
--subnet-id $NEW_SID1 \
--block-device-mappings file://mapping.json \
--user-data file://my_script.txt \
--tag-specifications 'ResourceType=instance,Tags=[{Key=Name,Value=NEW-WEB}]' 'ResourceType=volume,Tags=[{Key=Name,Value=NEW-ROOT}]'
# NEW_IID=i-0c49036485c1ce2bd
# aws ec2 describe-instances --instance-id $NEW_IID | grep PublicIp
# ssh -i "new-key.pem" ec2-user@3.38.165.0
# curl 3.38.165.0


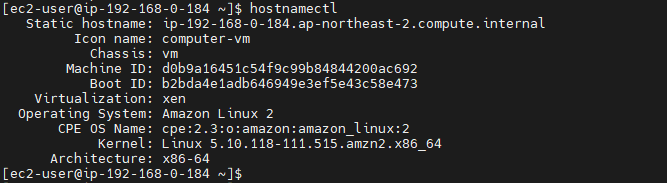
EC2로 SSH 세션 접속(xvdb 를 사용할 수 있도록 마운트)


서비스 삭제


CloudFormation
# vi new-vpc.yaml
AWSTemplateFormatVersion: 2010-09-09
Resources:
VPC: => 원하는 이름 임의로 입력 가능, 식별자의 역할(태그X)
Type: AWS::EC2::VPC
Properties:
CidrBlock: 192.168.0.0/16
EnableDnsSupport: true
EnableDnsHostnames: true
InstanceTenancy: default => 공용 자원으로 사용할 것이라면 default 입력
Tags:
- Key: Name
Value: NEW-VPC
InternetGateway:
Type: AWS::EC2::InternetGateway
Properties:
Tags:
- Key: Name
Value: NEW-IGW
VPCGatewayAttachment:
Type: AWS::EC2::VPCGatewayAttachment
Properties:
VpcId: !Ref VPC
InternetGatewayId: !Ref InternetGateway
SubnetA:
Type: AWS::EC2::Subnet
Properties:
AvailabilityZone: ap-northeast-2a
VpcId: !Ref VPC
CidrBlock: 192.168.0.0/20
MapPublicIpOnLaunch: true
Tags:
- Key: Name
Value: NEW-PUBLIC-SUBNET-2A
SubnetB:
Type: AWS::EC2::Subnet
Properties:
AvailabilityZone: ap-northeast-2b
VpcId: !Ref VPC
CidrBlock: 192.168.16.0/20
MapPublicIpOnLaunch: true
Tags:
- Key: Name
Value: NEW-PUBLIC-SUBNET-2B
SubnetC:
Type: AWS::EC2::Subnet
Properties:
AvailabilityZone: ap-northeast-2c
VpcId: !Ref VPC
CidrBlock: 192.168.32.0/20
MapPublicIpOnLaunch: true
Tags:
- Key: Name
Value: NEW-PUBLIC-SUBNET-2C
SubnetD:
Type: AWS::EC2::Subnet
Properties:
AvailabilityZone: ap-northeast-2d
VpcId: !Ref VPC
CidrBlock: 192.168.48.0/20
MapPublicIpOnLaunch: true
Tags:
- Key: Name
Value: NEW-PUBLIC-SUBNET-2D
RouteTableA:
Type: AWS::EC2::RouteTable
Properties:
VpcId: !Ref VPC
Tags:
- Key: Name
Value: NEW-PUBLIC-RTB
InternetRoute:
Type: AWS::EC2::Route
DependsOn: InternetGateway
Properties:
DestinationCidrBlock: 0.0.0.0/0
GatewayId: !Ref InternetGateway
RouteTableId: !Ref RouteTableA
SubnetARouteTableAssociation:
Type: AWS::EC2::SubnetRouteTableAssociation
Properties:
RouteTableId: !Ref RouteTableA
SubnetId: !Ref SubnetA
SubnetBRouteTableAssociation:
Type: AWS::EC2::SubnetRouteTableAssociation
Properties:
RouteTableId: !Ref RouteTableA
SubnetId: !Ref SubnetB
SubnetCRouteTableAssociation:
Type: AWS::EC2::SubnetRouteTableAssociation
Properties:
RouteTableId: !Ref RouteTableA
SubnetId: !Ref SubnetC
SubnetDRouteTableAssociation:
Type: AWS::EC2::SubnetRouteTableAssociation
Properties:
RouteTableId: !Ref RouteTableA
SubnetId: !Ref SubnetD
'KOSA 클라우드 솔루션즈 아키텍트 양성과정' 카테고리의 다른 글
| [7.1] Terraform 복습(alb 생성) (0) | 2022.07.01 |
|---|---|
| [6.30] CloudFormation, Terraform(yaml , 스택, tf ) (0) | 2022.06.30 |
| [6.21] 하이브리드 클라우드(ESXi, Storage gateway) (0) | 2022.06.21 |
| [6.20] 하이브리드 클라우드(AWS와 오픈스택의 연동) (0) | 2022.06.20 |
| [6.17] 오픈스택, 퍼블릭 클라우드(하이브리드 클라우드 기초) (0) | 2022.06.17 |


